
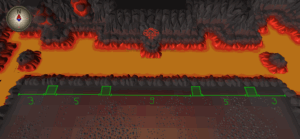
The Inferno is a very difficult solo PVM challenge, with the goal of completing all 69 waves and killing TzKal-Zuk. Players who are successful will be rewarded with the infernal cape.
Before attempting it, it is highly recommended that you have the best gear that you can afford and maxed or very high combat stats. More importantly, do not expect to complete it on your first few attempts: be mentally prepared to fail a lot and learn from your mistakes.
Key
As the monster names can be difficult to memorise, for the sake of clarity this strategy page will follow these nicknames:
| Image | Name | Nickname | Image | Name | Nickname |
|---|---|---|---|---|---|
 |
Jal-Nib | Nibbler |
 |
Jal-MejRah | Bat |
 |
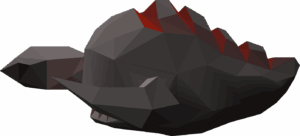
Jal-Ak | Blob |
 |
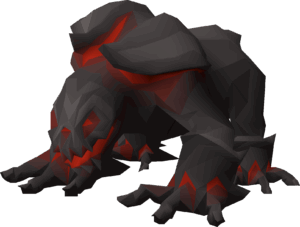
Jal-ImKot | Meleer |
 |
Jal-Xil | Ranger |
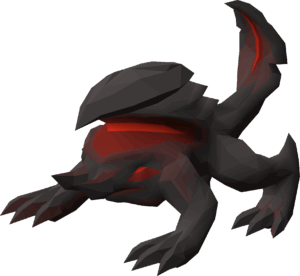 |
Jal-Zek | Mager |
 |
JalTok-Jad | Jad |
 |
Yt-HurKot | Healer (for Jad) |
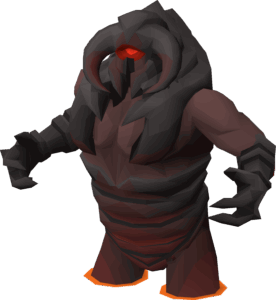 |
TzKal-Zuk | Zuk |
 |
Jal-MejJak | Healer (for Zuk) |
Wave breakdown
General strategy
The arena is square shaped, and there are three pillars in it. These pillars can be used to safespot monsters, although they do not offer complete protection from all the monsters in the cave considering their spawns are spread whenever a new wave starts. In addition, every wave until 67 spawns three or six nibblers, which attempt to destroy the pillars.
The general idea is to neutralise the nibblers at the start of each wave, preferably with Ice Barrage, and find a way to manoeuvre the arena to trap monsters behind the pillars to minimise the damage; attempting to purely tank will almost certainly lead to death in the later waves. All monsters are very accurate and deal high damage, but each one’s attacks (apart from Zuk’s) can be fully blocked with protection prayers. Multiple monsters targeting the player at the same time is common, so alternating protection prayers between them is highly recommended, if not required. When this is not possible, choosing which monster to protect from is equally important.
Much like the TzHaar Fight Caves, once a monster is first introduced in that wave sequence, it will appear in subsequent waves. Prior to the introduction of a new monster for the first time, a wave of six nibblers will appear as a precursor to their arrival. Afterwards, the new monster will spawn in that wave set, and the second one of that type will not appear until the doubles of all the monsters before it are cleared.
Using Blood Barrage is a recommended method of healing when a wave is under your control and incoming damage can be reliably protected, as it is effectively only limited by the amount of hitpoints the monsters have while Saradomin brews are much more limited. Although most monsters are fairly resistant to magic, it can still hit more often than not when maging gear is equipped. Make note of the Magic level of each monster, as it largely dictates how accurate your magical attacks are against them. However, Blood Barrage does not deal damage to singular targets very quickly, nor does it heal quickly. Because of this, using it in a tight situation (before a wave is solved) might not be a good idea.
Monsters (regular waves)
Jal-Nib
| Size | Attack speed | |||
|---|---|---|---|---|
| 4 | 10 | 15 | 1×1 | 4 |
Nibblers are the lowest level monsters in the Inferno. Three will always spawn in every wave until wave 67, though six will appear instead during waves 3, 8, 17 and 34. When six appear, no other monsters will spawn with them, though it is an indicator that a new monster is about to appear in the subsequent waves.
Nibblers will prioritise an intact pillar (of which the targeted one is random) and will attack it, dealing 2-4 damage every 2.4 seconds. It is important to kill these when given the chance, as the pillars will crumble to their attacks, leaving them open to other monsters and denying them that pillar’s benefits that a player could potentially need. If all three pillars are destroyed, the nibblers will target the player instead. Despite their lower stats, they will always hit regardless of the player’s armour bonuses.
They can usually be hit even when wearing ranged armour which gives negative magical accuracy, which is useful in the higher waves due to its higher range defence. An easy way to tell if the cast will kill them without waiting for the hitsplat is by looking at the experience drop: when using Ice Barrage, 152 experience (112 Magic and 40 Hitpoints) will mean that all three were killed in one cast (provided that no other monster was also hit).
While taking them out is important, do not risk your life over it in the higher waves (50+). In worst cases, splashing on them repeatedly will cause you to take a lot of damage, and you can kill them when the situation is better under control.
Jal-MejRah
| Size | Attack speed | |||
|---|---|---|---|---|
| 19 | 25 | 120 | 2×2 | 3 |
Bats are the second-lowest level monsters. While they use ranged attacks, they also have a fairly short range of four tiles, which potentially allows the player to attack them safely with a toxic blowpipe on rapid if they are properly safespotted. When not protecting from ranged attacks, their attacks will drain the player’s run energy by 3 and have a chance to lower combat stats (except Prayer) by 1. Their Magic level is moderately high, but their Magic defence of -20 compensates for it.
Due to their lower damage output than other monsters in the arena, they are generally low priority. Regardless, try to get them stuck behind a pillar and pray against them when possible, as their damage is still nontrivial if not protected.
Jal-Ak
| Size | Attack speed | |||
|---|---|---|---|---|
| 29 | 40 | 160 | 3×3 | 6 |
Blobs are the third tier of monsters, starting to appear on wave 4. Their attacks are unlike any other: instead of attacking immediately when acquiring the target, they first detect if the player is protecting against ranged or magic, and they attack with the opposing style three ticks afterwards. After their attack, they again detect after three ticks; in essence, when not hiding from them, they attack every six ticks. Getting used to this may take some time, and they can be tough to protect against when having to protect against another monster, such as a mager.
When they are defeated, three smaller (1×1) monsters spawn from it: a mage, a range, and a melee blob. Their eyes and attacks are coloured accordingly to their attack style. When they spawn, they attack on the same tick (unless they have to move to reach you). Each has a max hit of 18, and their attack and defensive stats are purely focused on the style they use. As they are typically next to each other, using Blood or Ice Barrage can be effective on them, although the mage blob is less weak to magic.
An easy way to protect from blobs is to alternate protection prayers every tick (e.g. mage → range → mage → range etc.). This is also useful when also protecting from a ranger or mager, and when properly done it nullifies all damage taken.
Blobs can also attack with melee if you stand too close, even diagonally. Do not stand next to them to prevent this from happening, as they can deal quite a lot of damage.
Jal-ImKot
| Size | Attack speed | |||
|---|---|---|---|---|
| 49 | 75 | 120 | 4×4 | 4 |
Meleers (also called snakes by some players) are the middle of the pack. They start to appear on wave 9. As their nickname implies, they only use melee attacks, which makes them potentially less dangerous than others when they are at a distance. Their large size also gets them stuck behind pillars quite easily. However, their attacks are very powerful, and their special feature is being able to burrow to appear next to the player when they have not attacked for 20 seconds.
When they are stuck behind a pillar along with every other monster, it may be a good idea to wait for them to dig to you so you can take them out safely. When you are under attack by another monster that you cannot hide from, and there is a meleer safespotted, it will inevitably dig to you. If you cannot kill the other monster quickly, be ready to flick between them. Ice Barrage may be cast on them to neutralise them for the time being, but this still counts toward their timer of being unable to attack. When they dig to you while you are behind a pillar, make note of their deceivingly large size. It might look like it is ready to attack while it is still ‘under’ you, and attacking it might cause you to move to a vulnerable spot.
Jal-Xil
| Size | Attack speed | |||
|---|---|---|---|---|
| 46 | 125 | 90 | 3×3 | 4 |
Rangers are the second-most powerful of the standard monsters in the Inferno, and they first start appearing on wave 18. They primarily use ranged attacks, but they sometimes use melee if the player is standing next to them, even diagonally. These ranged attacks are quite powerful and fairly accurate, so they should not be underestimated.
The ranger has no special feature to them unlike the other monsters. Due to their lower Magic level and higher Hitpoints than most others, as well as having easy to predict attacks, they are often an ideal monster to cast Blood Barrage on if the situation is under control.
Jal-Zek
| Size | Attack speed | |||
|---|---|---|---|---|
| 70 | 220 | 300 | 4×4 | 4 |
Magers are the most powerful of the monsters in the regular waves. They appear on every wave from 35 to 66, as well as on wave 69. They attack with a powerful mage attack, as well as a melee attack if the player gets too close. These attacks can be devastating, and so they should always be prioritised when choosing to protect from multiple styles. Their special feature is being able to revive other monsters slain on the current wave. It uses this feature only when in combat and it does not attack during it (both when casting and within the next seven ticks). The mager has no defined limit on how many monsters it can revive, but each monster can only be revived once. They also respawn with half of their normal Hitpoints, and they respawn near the centre of the arena. The revived monster also has a short cooldown before it can attack the player.
When possible, killing the mager first is a good idea to save yourself from having to kill the others it may revive again. They have high health though, so if you are under attack by another monster, it may be better to kill that one first. Naturally, the monsters it revives can also be used to heal with Blood Barrage, so use that to your advantage if you are in need of healing. Because of their high Magic level, Blood Barrage is quite ineffective against them, but it may hit occasionally with the appropriate gear on. In contrast, a twisted bow is very effective against it.
Much like the ranger, magers can melee diagonally across.
JalTok-Jad
| Size | Attack speed | |||
|---|---|---|---|---|
| 113 | 350 | 510 | 5×5 | 8 (wave 67 & 69) 9 (wave 68) |
Jad is the demi-boss of the Inferno, encountered on waves 67–69. It behaves nearly identically to TzTok-Jad from the TzHaar Fight Caves, although its stats are higher. It uses all three combat styles, and its attacks are extremely powerful. The trick is to use the proper protection prayer which can be predicted based on the start of its attack animation: if it attacks with magic, it rises on its hind legs and casts a fire spell from its mouth; if it attacks with ranged, it rises on its hind legs only for a brief moment before slamming the ground, causing a boulder from the ceiling to hit the player; if it attacks with melee (which it only does if the player is standing next to it), it bashes its head, which has to be preemptively protected from.
As with the rest of the Inferno, having game sounds on is greatly helpful to react in time. With this, an easy way to tell if it is a mage attack is that it plays a sound as soon as it begins its attack animation. Otherwise, it is a ranged attack, whereupon the sound plays when you should already be protecting from it. Be sure to stand away from its melee range, and it will only use these two attacks.
When it reaches half of its health, it will spawn five Yt-HurKots that will begin to heal it. Use your ranged weapon or barrage spells to tag them to draw them away from Jad, which will cause them to stop healing it. However, at all times, don’t forget to be ready to react to Jad’s attacks. The healers use melee (with a max hit of 18), and while they can be tanked, it is a good idea to try to arrange them in a position where only one can attack you. A possibly riskier manoeuvre is to tag them to you and run through Jad between its attacks (pray melee just in case it attacks you), which will have them stuck behind it unable to attack you. If you require healing, you can cast Blood Barrage on the healers. Jad, however, is very resistant to magic. The twisted bow is the most effective weapon against Jad, followed by the bow of Faerdhinen and blowpipe.
As a general tip, remember that you can take a pause between waves by pressing the logout button to prepare yourself. You may also practice facing against Jal-TokJad in TzHaar-Ket-Rak’s Challenges, although limited to a cap of two at a time if the Inferno has not been cleared.
Triple Jads
Right after the first Jad on wave 67, three Jads will appear in wave 68. The Jads will spawn in a triangle formation around the centre, have an attack speed of 9 (5.4 seconds) rather than the typical 8. The first Jad attacks normally, and the second and third ones will attack 3 ticks afterwards, resulting in a 9 tick cycle (with 3 ticks to react to each Jad). This wave is often nerve-wracking for most players, since an unprotected Jad hit will kill the player in one hit if they are not boosted over 113 Hitpoints. To make up for the harder difficulty, each Jad will only spawn three healers rather than five.
It is important to keep prayer high and use hotkeys to quickly swap between the inventory and prayer tabs. Focus on praying against the Jads rather than attacking them, to allow ample time to react to incoming attacks.
TzKal-Zuk
| Size | Attack speed | |||
|---|---|---|---|---|
| 148 | 1200 | 150 | 7×7 | 10 (normal) 7 (enraged) |
Zuk is the final boss of the Inferno. The premise of the fight is that glyph that used to seal Zuk now moves between you and it, which you must use to block its attacks. Failure to do so will cause Zuk to hit you, which will more than likely kill you outright as it cannot be protected from or be tick-eaten and it has a max hit of 148. Focus on staying behind the shield more than dealing damage. Don’t get demotivated if you fail at this stage. Very few players have beaten Zuk on their first attempt, and you should take failures as a learning experience.
Always remember to be moving with the shield. It is never worth it to get in an extra hit if it means risking a Zuk hit. As the shield animation isn’t 100% reflective of its true position, opt to stay in the middle or slightly in front of it rather than behind it.
As this is the final wave, do not be sparing with using any supplies you may have left. This is also where the stamina potion comes into play, as well as the Armadyl crossbow or bow of Faerdhinen if you do not have a twisted bow, due to its much longer range compared to the blowpipe.
Due to difference in damage output, some strategies differ between crossbows and twisted bow. If you have a twisted bow, use it against the mager, Jad and Zuk, while using blowpipe for rangers and healers. If you have a crossbow, use it against Zuk and Jad, as well as the mager when you are at the corner, while using blowpipe for the rest. When using a crossbow, remember to take into account ruby and diamond bolts’ special effects; in general, use ruby bolts while the monster is high health, and switch to diamond when they have low health.
Periodically during the fight, additional monsters will spawn. Apart from Zuk’s healers, each will attack the shield at first, which cannot sustain much damage as it only has 600 Hitpoints, therefore you should attack and kill them to take their aggression.
- A mager and a ranger will spawn behind you after the shield has done a complete rotation (e.g. left → right → left).
- From here, following sets of a mager and a ranger will spawn approximately 3 minutes and 30 seconds after the previous set. However, the timer is paused and is increased by 1 minute and 45 seconds at 600 Hitpoints and unpaused at 480 Hitpoints, as detailed below.
- Jad will spawn behind you when Zuk reaches 480 Hitpoints.
- Healers will spawn when Zuk reaches 240 Hitpoints. They will start to heal Zuk, and you should again attack and kill them. They attack with area-of-effect blasts that cannot be protected from, although they have a fairly low max hit of 10.
Some players suggest to log out and reset the wave if the shield starts moving west to allow you better attacks from the start. While this used to work, it has been updated to always go the same direction per run, and resetting it is in fact counterproductive as it causes Zuk to attack at different times than what is strategised for in most guides.
Due to a graphical bug, it is possible for some of the additional monsters to flicker for a brief moment when they switch target from the shield to the player. Clicking on one during this time will cause you to click “through” the monster instead of attacking it and possibly run out of the shield’s protection.
Dealing damage without taking it
“Safespots” at Zuk, highlighted in green. The middle spots work only before Zuk becomes enraged when it spawns its healers. Behind the central glyph is where Zuk will spawn.
When the wave starts, a short cutscene will play and you are in front of Zuk at the north wall of the arena. The shield will slowly float between the wall’s ends, and you should stay behind it. The shield can block Zuk’s attacks indefinitely. There are certain tiles where you can be safe to stand if the shield is beside you. If you want to be safe, do not attack outside of these tiles, but sometimes you can get an extra attack between them if you are confident you can run to the next spot before Zuk attacks. However, sometimes attempting to attack will cause you to be ‘dragged’ out of the shield’s protection and take a hit from Zuk. You can mark these tiles with empty vials or by taking runes out of your pouch and dropping them beside them. You may also ‘mark’ the tiles using the default client’s Shift+ Right click option. Some third-party clients also offer a more in depth tile marking feature.
Attack ranges
It is worth noting when some monsters are too far to attack, where clicking on them would drag you out of a safespot.
- When using an Armadyl crossbow (which has an attack range of 8), switch to longrange when you are at the west corner and need to attack Zuk, Jad or a mager, and at the east corner when attacking Jad. With other crossbows (which have a range of 7), you also need to be longrange at east corner when attacking Zuk.
- When using a twisted bow or bow of Faerdhinen (which has a range of 10), you can always stay on rapid attack style, as longrange does not benefit it at all. Bear in mind that it still has finite range, though.
- Blowpipe has a much shorter range of 5. Usually it is easy to visualise when something is within range; for example, you may only attack the ranger from the east side while west is too far, keeping in mind the safespots so you do not take any hits from Zuk.
- When you are at the east corner and attacking a ranger (with the blowpipe), stand on the marked safespot as standing more east will drag you out of the shield’s protection. This is also the case with using the twisted bow or Armadyl crossbow (with longrange) on Jad.
Killing spawns
As mentioned, magers and rangers will periodically spawn, and a Jad and healers will spawn upon Zuk reaching hitpoint thresholds.
Before Jad
When the shield has done a complete rotation, a mager and ranger will spawn. Protect from Magic and tag both. Skilled players may choose to flick between them, but this is rather risky and not recommended for people getting their first cape when there is already a lot to concentrate on. Remember that the ranger is capable of hitting high, so try to keep your health at least above 50. Kill the ranger with a blowpipe when you are on the east side and focus on Zuk when you are on the west side. Continue damaging Zuk to get it below 600 Hitpoints.
However, if it’s taking a long time to damage Zuk enough, which typically only happens with crossbows, you may kill the mager instead and allow the second set to spawn (without getting Zuk to 600 Hitpoints). This will allow you more time to kill the Jad. Kill the ranger as before, and keep the mager alive again and get Zuk below 600 Hitpoints.
Interlude
When Zuk reaches 600 Hitpoints, the timer between the sets of mager and ranger spawning will pause, and another 105 seconds is added to it. At this point, kill the mager, and continue damaging Zuk until it gets to 480 Hitpoints, where it will spawn a Jad. Tag it immediately and kill it as you normally would, but be careful: tagging the Yt-HurKot healers, switching protection prayers and moving with the shield can be a lot to take in. When the Jad spawns, the aforementioned timer will unpause.
When the Jad is dead, continue damaging Zuk, but do not let it go below 240 Hitpoints (as the twisted bow and ruby bolts’ special effect can deal high hits, 300 Hitpoints is a good place to stop attacking). The reason for this is that a second set will spawn relatively soon, and at 240 Hitpoints Zuk will spawn its healers; it is ill-advised to attempt dealing with both at once.
Healers and enraged Zuk
When the second (or third) set of ranger and mager spawns, kill both as before.
Upon reaching 240 or less hitpoints, Zuk will enter an enrage phase, fighting for his life while also spawning four Jal-MejJaks on the stream of lava in front of him. Zuk’s attack speed will increase from 10 (6.0 seconds) to 7 (4.2 seconds) This mostly invalidates the middle safespots. While attacking Zuk so that you get dragged in front of the shield was safe before healers, it is not at this stage. Take more care to stay with the shield, and attack Zuk while you are protected by it.
Jal-MejJaks will heal Zuk for around 15-25 very quickly, so quickly tag them to stop them from healing Zuk. It is recommended to swap to a blowpipe for its faster attack speed, as the MejJak has very low Defence. Once tagged, the MejJak cannot be attacked a few seconds afterwards, so tag other healer and alternate attacking the two. After being struck once, the healer will turn around and launch AoE blasts in front of them (around 3 tiles from the platform edge), dealing up to 6-9 damage if caught in one. The projectiles are launched as sparks and have a 3×3 AoE. It is best to keep health above 25 at the minimum, as getting caught by several strikes can kill the player. Once the healers are dead, focus on Zuk again.
Finishing the fight
When the healers are dead, be sure to use your remaining Saradomin brews and super restores to get your stats back up in case you need them, and continue attacking Zuk. If you are using a crossbow, switch to diamond bolts at around 180 Hitpoints. In the event that Zuk takes too long to be killed, a set of mager and ranger will spawn.
Tag at least the mager, and protect from it. If Zuk has a lot of health left, kill the ranger as in the first set, and do not waste time killing the mager. If Zuk is very nearly dead, you may choose to ignore the ranger, as you are likely to kill Zuk before the shield collapses from taking too much damage from the ranger.
Once Zuk reaches 0 Hitpoints, all the monsters remaining in the arena will perish with it, and you will emerge from the Inferno victorious, rewarded with an infernal cape and some Tokkul!
Using safespots
For the most part, safespotting in the context of Inferno refers to using the pillars to hide from monsters to not be under attack from everything at once. Only the meleer and bat can be attacked without them retaliating back due to their short attack range, while others have longer range than players can have.
If the monster has a line of sight and it is within attack range, it will stop moving towards you. You can use this to determine if a monster is safespotted, particularly with blobs as their attacks are delayed. Note that all monsters apart from bat and meleer have very long attack range, longer than the maximum of ten tiles that players can have.
Whenever using safespots (including the ones at Zuk), remember that when you are past your weapon’s maximum attack range and you have run enabled, attacking a monster may cause you to run further than is necessary. For example, if you attack a monster 11 tiles away with a twisted bow, which has a max range of 10, you will run two tiles closer to it if your run is enabled. This might potentially drag you out of your safespot.
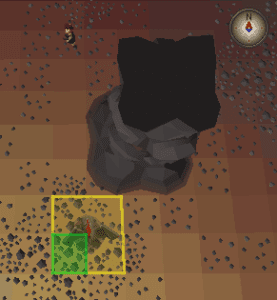
South-west rule

It is useful to know that all monsters larger than 1×1 tiles will attempt to align their south-west corner with you if they are unable to attack. In this image, the bat is also unable to attack because the distance exceeds its attack range, and the rest of it is stuck behind the pillar. If the player were on the east side of the pillar, the bat’s south-west corner would be aligned without any of it being stuck behind the pillar; it would move close enough to you to attack. If it was another monster (other than a meleer), or if the player moved one tile south, it would be able to attack.
An extension to this rule is that multi-combat attacks, namely barrage spells in the Inferno, hit the south-west corner of the monster. If you are behind the south pillar and there is a nibbler damaging it, but there is another monster (such as a mager) behind it, you can attack the mager with a barrage spell and it should damage the nibbler. The nibblers go to the westernmost tile of the north side of the pillar, which is directly next to where a monster’s south-west corner would be when you come to its line of sight from the west. This is much safer than targeting the nibbler directly, which will drag you next to it and make you vulnerable to more monsters.
Diagonal safespotting
The bat is stuck behind a corner. The player is safe from its attack unless they move.
All monsters can be safespotted with a corner, but only if the player is standing in the north or south and the monster in the west or east. Both also have to be directly at the corner. In this image, if the player moved south or west, the bat would gain line of sight and attack, but they can move back to the original tile to be safe again. If they moved east, the bat would move south and gain line of sight. This time moving back to the original tile will not undo it as the bat moved, and a new safespot would have to be found. If the positions were switched (with the player standing where the bat’s south-east corner is), this safespot would not work, as the player has to be in the north-south plane. If the monster is a meleer, moving south/north would also keep the player safe for three tiles from the pillar as it cannot attack diagonally even with line of sight.
Prayer flicking and off-ticking
Prayer flicking is incredibly useful in the Inferno, whether it be conserving prayer points or flicking between monster attacks to protect from both. While it is possible to complete it without flicking, it is very highly recommended to do it to at least some extent. Some prayer flicking tips are self-explanatory for those experienced with it in other areas of the game, but some are specific to Inferno.
For reference, one tick is 0.6 seconds. Almost every action in the game is reliant on taking some amount of ticks, as it is the frequency at which the game server updates data for players: for example, a mager attacks every four ticks, or every 2.4 seconds.
1-tick flicking
1-tick flicking can be used when there is only one monster attacking you, to conserve prayer while taking no damage as well as gaining an offensive boost. Remember to change your quick-prayers to match what you’re attacking if you choose to use the prayer orb.
While 1-tick flicking is based on the premise of only using one tick to have a prayer activated so it does not drain any prayer points, it only works if there are no other prayers continuously active. If you have a protection prayer active and you flick Rigour every tick, prayer points drain as if you have both activated normally instead of only draining for the protection prayer’s worth.
Having game sounds on is particularly helpful for players new to 1-tick flicking. Be wary as messing up the timing can cause you to take a big hit.
Flicking between monsters
Flicking between different monsters is very helpful: for example, if a ranger and mager is attacking you at the same time and you cannot get one safespotted, you can protect from range while the ranger is attacking and switch to mage protection when the mage is attacking, which you can continue doing indefinitely.
It is more tricky to do when the monsters have different attack speeds. However, this is generally unavoidable only with the bat, and due to its low stats compared to the rest, it is usually not a big deal as you can kill it quickly. While blobs also have a different attack speed from the meleer, ranger and mager, their unique style of attacking can be compensated with this, as seen below.
Sometimes they can attack on the same tick, making it impossible to protect from both. Walking under one of them can stall its attacks while the other is free to attack, “off-ticking” them. When they are behind a pillar and both would attack you at the same time, there are some things you can do to offset it.
Note: Magers can revive fallen monsters on the southern side of the north pillar. They cannot attack immediately as they respawn, but be ready to hide behind the pillar to re-assess your situation. Sometimes they are also stuck ‘under’ other monsters instead of being in a straight line, which may occasionally make the strategies listed not work as expected.
Blob(s) and other monster

When you have a blob behind a pillar — or in fact, elsewhere in the arena — you can alternate your protection prayers between range and mage to protect from it. As rangers and magers have an attack speed of four ticks, this also works to protect from their attacks. This works even with two blobs. For example, if a ranger and blob are attacking you, protect from range first and start alternating every tick.

Flicking between blob and meleer.
With meleers, a different method is used, as blobs only use magic and ranged attacks at distance. This method does not completely block all damage, as 50% of the blob’s attacks will not be protected by prayers, but it does protect against the meleer while helping against the blob, which is better than attempting to only tank another. This may also protect against rangers and magers, but only if they are properly off-ticked, which is likely not the case. When the meleer attacks, pray melee. Afterwards, with every tick, switch to range, mage, range, and repeat the cycle by starting with melee again.
Ranger and mager behind pillar
Off-ticking ranger and mager behind the north pillar.
In the later waves, having both a ranger and mager behind a pillar is a common encounter. To have them attack at different times which allows you to take no damage, stand in the middle tile of your side of the pillar and attack the farther one (or run two tiles to the west). Make sure to have run enabled. This will cause the farther one to attack you first and the closer to attack one tick after. This works both at the north and south pillar. If you do not attack from the middle tile, or if you click on the one closest to you, they will be attacking on the same tick.
Try not to attack the farther monster with your blowpipe, as you will likely be dragged to the melee range of the closer one due to its short range. With decent mouse accuracy, you should be able to switch weapons between flicks if you prefer.
Ranger, mager and blob/bat behind pillar
It is also possible for the above scenario to happen with an additional blob/bat or two with the pack. If the blob/bat is not the one closest to you, use the above strategies combined. However, if it is the closest, this would subject both the mager and ranger in the back to attack you simultaneously.
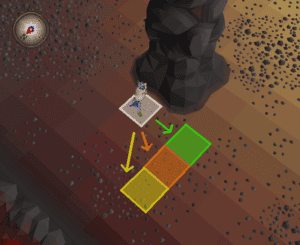
Green: mager and ranger only
Orange: bat or blob in front
Note: the yellow tile is functionally equivalent to the orange tile, and has no advantage over the orange tile.
Due to the size differences of the monsters, the ways to off-tick them properly may differ. A convenient way for this is shown in this image: go from the middle to the tile highlighted in orange if there is a bat or blob in front. Otherwise, use the green tile. In extremely rare configurations in which two bats or blobs are stacked in front of the mager and ranger, you may need to run out from the furthest north tile.
Turn on the corresponding protection prayer of the monster farthest to you and step two tiles west, then in the next tick switch to the other protection prayer, as they have become off-ticked. If there is a blob, try to also alternate the protection prayers, but if there is a bat then it is too far to attack you.
Dealing with spawns
Being able to deal with spawns properly is essential, as it is the most hectic part of each wave and subjects players to a lot of incoming attacks. While this skill mostly comes from experience, there are some things that are good to know beforehand.
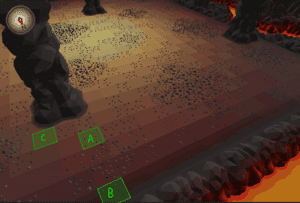
Useful spots at the north pillar.
- Whenever the last wave ends, prepare to cast Ice Barrage on the nibblers. Try to cast it on the middle one of the pack, which will make it the most likely that all are affected. If they don’t all die, assess whether you can cast another spell without much risk or if it’s better to get the situation under control before finishing them off.
- The north pillar is a good place to start each wave. Specifically, the tile on the western side two north of it (highlighted as A in the image) will allow you to freeze the nibblers, usually without being in sight of monsters spawning south. If the nibblers are at the north pillar, you can move all the way north (highlighted as B) to reach them without anything south of the pillar being able to target you.
- As a general rule, at the start pray range from waves 1 to 33 and mage from 35 to 66. This of course depends on the spawned monsters — you don’t need to pray range on wave 9 when only a meleer will spawn — but it is the most easy to memorise. When in doubt, prioritise protection in order of mager > ranger > meleer > blob > bat.
- When things get too chaotic, you may attempt running to another pillar for cover. As you are running, make sure to equip your most defensive gear. Mage armour has no ranged defence, so ranged armour is preferable. Prayer flicking here also helps, even just slightly alternating prayers between monster attacks will improve your chances of surviving.
- Whenever a monster spawns in the middle-west and you are at the north pillar, you can move to the eastern tile on the north side of the pillar (highlighted as C) to lure the monster in range. It is still too far away for blowpipe, but twisted bow and spells can reach it.
- Whenever a monster spawns in the north-west and you are at the north pillar, it is generally too far to be attacked. If you need it to move closer, go to the east side of the pillar to lure it.
- On wave 50 and after, both a ranger and mager will spawn. Maximise your ranged defence to take less damage from the ranger by putting on your ranged armour; despite the lower magic offensive bonus, you are still quite accurate against the nibblers. Augury can also help mitigate the accuracy loss as well as give you more defence. If the mager is safespotted, try to switch to protecting from range immediately as the ranger’s attacks can deal a lot of damage.
- When you need to run to the south pillar for cover, chances are that the monsters are not directly behind the pillar and come up from the east side. Right as you arrive there, try to go to the west end of the north side of the pillar to potentially get them stuck behind the pillar, but if this doesn’t work, use diagonal safespotting to trap one at the corner (wherein you stand south of the pillar corner and it is east of it), so you have one less thing to worry about in a possibly chaotic situation.
- Unlike the Fight Caves, the location of each monster is random at the start of each wave; there is no connection between waves and so they cannot be predicted.
Miscellaneous tips
- Before entering, it may be helpful to sip a dose of some potions (such as bastion) and eat an anglerfish at the bank for the extra stats and health without taking up more inventory space. Using the ancient mace special attack on an undead combat dummy with a high strength bonus can also provide extra prayer points to start with, up to 37 more with a fire cape (or 38 with infernal cape).
- Resizable mode can be greatly helpful as it allows you to see more of the arena without rotating your camera.
- Having game sounds on is greatly helpful as it allows you to hear things you might not see (such as an attack from a blind angle) and it assists with prayer flicking.
- Especially when learning, do not be afraid to use your Saradomin brews and always keep your health high. You are much more likely to die from being too prudent with supplies than to get to Zuk and wish you had more. Try to get as far as you can to get more experience under your belt, even if it means using more time on a run that won’t be successful.
- You can pause the minigame between waves by pressing the logout button, which sends a pause request that will take place at the end of the wave. Pressing it again (provided that you’re not in combat) will reset the current wave. While the minigame is paused, your stat changes and other timers (such as run energy restoration) are paused as well. Pausing is particularly useful following waves 67 and 68, as it gives you some time to restore your health, prayer, and boosts if necessary. To continue the run, log out and back in, but remember to pick up any items you had on the floor as they will not carry over.
- Remember your attack ranges. For the most commonly used weapons in the Inferno, without the longrange option selected: the toxic blowpipe has an attack range of 5 tiles, Armadyl crossbow is 8 tiles (while lower tier crossbows are 7), and all combat spells and twisted bow is 10 tiles. Most monsters have a much longer attack range, however.
- A plethora of written and video guides exist for helping with different aspects of the Inferno. Using these resources can help you visualise and understand things you didn’t know of.
- With the previous tip in mind, personal experience is more important than anything else in succeeding in the Inferno. While better gear may be very beneficial, knowing what to do and when from having experienced the situation before is much more likely to save you.
- As previously mentioned, be mentally prepared. Becoming demotivated from dying is the greatest detriment to your success, and you will likely improve with each and every attempt.
Suggested skills
 90+
90+- 90+
- 80+
- 94+
- 90+
Equipment
Notes on gear:
- A Twisted bow and Kodai wand / Eldritch nightmare staff are considered to be the most influential gear investments for the Inferno. However, expensive armour pieces (such as the Elysian spirit shield, Masori armour, and Virtus robes) only perform modestly better than their inexpensive counterparts (Crystal shield, Karil’s armour, and Ahrim’s robes, respectively). Overall, the most important factor to success is player skill and experience.
- There are many options for exact gear loadouts, but the best setup is the one that works for you; adjust your gear based on your experiences. For instance, some players may forego one or even both mage armour pieces since nibblers have low Magic defence, and starting off with the low ranged defence of mage armour becomes much riskier in later waves.
- Rigour and Augury are strongly recommended to have unlocked.
- In the Inferno, Crystal armour is more effective than Armadyl armour due its higher ranged defence and prayer bonus, even when not using a bow of Faerdhinen.
- The max cape is comparable to Ava’s assembler for several reasons: it has defence and prayer bonus, still collects your ammo, has passive regeneration akin to Rapid Heal, and gives more prayer restore per potion. However, an assembler gives the Toxic Blowpipe a damage boost, which can come in use when something has to be killed quickly. A trimmed Ranging cape is also an option for extra prayer bonus.
| Slot | Recommended equipment for Learners – Item (most effective → least effective) | |||
|---|---|---|---|---|
| N/A | N/A | |||
| N/A | ||||
| N/A | N/A | |||
| N/A | N/A | |||
| N/A | ||||
| N/A | N/A | N/A | ||
Inventory
|
|
|||||||||||||||||||||||||||||
|
|
||||||||||||||||||||||||||||||
- Ranging armour
- Toxic blowpipe
- Twisted bow, Bow of faerdhinen or best crossbow available
- Rune pouch containing soul, blood, and death runes for Ice Barrage and Blood Barrage; if not using a kodai wand, also bring water runes
- With a divine rune pouch also containing water runes, an eldritch nightmare staff may be freely used in place of a kodai wand for its special attack, albeit with slightly lower magic accuracy
- Falador shield 4 for two daily full prayer restorations (optional)
- Saradomin brews and super restores; the quantity may differ from person to person, depending on how much you prayer flick
- 1-2 Bastion potions
- Stamina potion
As Inferno slayer tasks are only available after killing Zuk at least once, you should already have some experience. The same notes apply, although with the potent boost from the Slayer helmet (i), you may choose to adjust your setup more for offense. If you are confident in your ability to avoid damage, consider bringing extra ranging and super restore potions for more boosts and offensive prayer usage throughout the waves.
| Slot | Recommended equipment for On task – Item (most effective → least effective) | |||
|---|---|---|---|---|
| N/A | N/A | N/A | ||
| N/A | N/A | |||
| N/A | ||||
| N/A | ||||
| N/A | N/A | |||
| N/A | N/A | |||
| N/A | ||||
Inventory
|
|
|||||||||||||||||||||||||||||
|
|
||||||||||||||||||||||||||||||
The Bulwark Setup is an option for players that struggle with difficult prayer flicking in the later waves. By wearing Justiciar armour and the Dinh’s bulwark, the player increases their range defence dramatically as well as adding damage reduction from the Justiciar armour special effect. This allows players to tank the inferno monsters much more effectively and allows the use of the Dinh’s bulwark special attack to clear nibblers at the start of difficult waves.
Pros and Cons
|
|
|||||||||||||||||||||||||||||
|
|
||||||||||||||||||||||||||||||
This strategy comes with several tradeoffs that will influence if this setup is appropriate for a given player.
Pros
- Moderately reduced reliance on advanced prayer flicking and movement.
- Allows a strong backup to reposition when caught in a sticky situation.
- Ability to tank range minions at Zuk much easier if needed.
Cons
- Slower wave completion times and more difficult final bosses due to missing offensive gear.
- Less reliable than the proper advanced methods due to reliance on RNG.
- Doesn’t practise advanced skills for consistent and repeat completions.
Strategy Notes
If you are considering using this setup, it is important to understand that it should not be a complete replacement for learning standard mechanics such as safespots, corner traps, blob flicking, etc. Dinh’s bulwark is primarily used to clear up the nibblers at the start of waves, tank while repositioning, and at Zuk to tank range minions when needed. It is not expected to be used to brute force every wave; most waves should be completed normally using magic and ranged.
Other tips:
- Only use the Dinh’s bulwark special attack to clear nibblers when needed, otherwise use ice barrage as normal. Using it every wave reduces prayer restoration from the Eldritch nightmare staff.
- The Dinh’s bulwark special attack should primarily be used when you are intentionally starting the wave in the center. If you are clearing nibblers at a distance it is often better to use magic with the Justiciar armour on.
- This method is extremely effective when combined with wave scouting as it allows an easy way to clear the nibblers before running to a planned safespot.
- The Block attack style of the Dinh’s bulwark should be used when repositioning if possible. Note that there will be an 8 tick (4.8 seconds) attack delay afterwards when swapping to a different weapon. The attack delay can be avoided by always keeping the bulwark on the Pummel attack style, though this will not provide the bulwark’s 20% damage reduction passive.
- If you do intend to use the Dinh’s bulwark for the majority of waves, consider bringing a Lightbearer as your ring.
- The gear setup listed can be modified based on what the player has and their preference. Another perfectly viable setup would be to take this and swap the Dinh’s bulwark and Amulet of blood fury for an Occult necklace and Necklace of anguish. This still has the ability to tank but without losing much dps. This alternative is especially good if you have access to an Elysian spirit shield.