

This page gives an in-depth tutorial for each of the roles in Barbarian Assault. This page also gives extra information on obtaining maximum points and how to achieve faster queen kills. The article assumes very basic knowledge of the minigame; visit the gameplay section of the main article for a general overview.
Before starting a role, it’s recommended to first read the universal strategies section below, and then read the explanation of the specific role. Players looking for additional strategies can see the advanced strategies article.
Equipment

General information
While playing Barbarian Assault, players will suffer melee, ranged or poison damage from the Penance monsters. As such, wearing melee armour with both high melee and ranged defence bonus is recommended. Attackers should refer to the attacker section below.
Many players wear Penance armour for visual appeal or as a sign of experience in the minigame. Players struggling to get invited to teams may find it worthwhile to wear Penance armour in the lobby; note however that it has no additional effect on the monsters in-game.
Players on the healer and defender roles should have empty inventories. All free slots are filled with food from the item dispensers, so fewer inventory slots may leave you having to restock at the machines multiple times.
During Wave 10, the Penance Queen will attack with a ranged attack when distant and a melee attack when in range. She can also use a strong group ranged attack at any time, even if players are not in her view, so using armour with high Ranged defence is recommended for the final wave. While usually unnecessary, players of any role can heal on the queen spawn with the Guthan’s set effect, Amulet of blood fury, Sanguinesti staff, or the Saradomin Godsword, Ancient godsword, or Toxic Blowpipe special attacks. Additionally, jars of Snowy knights or Sunlight moths can be brought and released to heal 15 or 8 hitpoints respectively for the player and up to 3 nearby teammates.
Weapons for non-attackers
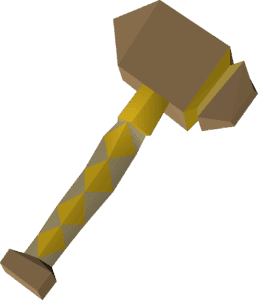
While non-attackers don’t need weapons, they can still benefit from filling their weapon and shield slots. Defenders can wear an imcando hammer to remove the need to collect a hammer for repairing traps. A Dinh’s bulwark is recommended if the player has a high enough Agility level to regenerate run energy fast enough. For a much lighter alternative, any Rune or better shield (ideally a fully charged Dragonfire shield) can be used alongside a Zamorakian hasta to provide decent crush and ranged defence bonuses. If those are unavailable, players can opt for Excalibur, a Rune/Dragon longsword, or the Ivandis/Blisterwood flail to still gain a +2 crush defence bonus. Excalibur also has an additional benefit of providing a Defence-boosting special attack which can be used at the start of every wave.
Universal strategies


Lobbies and planning
- A standard team starts with two attackers, and if needed switches to two healers after wave 7.
- With a single high ranged level attacker, it is usually faster to have two healers from the beginning.
- Having two collectors or defenders is almost never necessary. Penance runners are easily killed with red or green eggs.
- After defeating the Penance Queen once, consider completing the hard Kandarin Diary as you will get 10% more points if completed.
Main waves
The following tips apply to players in all roles:
- Calling fast is the most important part of Barbarian Assault. You can call by right-clicking the horn in your inventory and selecting the correct option. The information you need to call changes every 30 seconds, indicated by the text flashing white.
- The ear icon in the top right corner shows you what to do, and the mouth icon shows what you need to call to your teammate(s).
- Never run down the centre lane at the start of the wave. Attackers and Collectors run west around the west cannon hill; Healers and Defenders run east around the east cannon hill. Always stay on these sides at the start of each wave to avoid drawing aggression and pulling penance away from the players who need to kill them.
- After completing your role’s job, you should head to one of the cannons and fire red or green eggs at the remaining penance creatures.
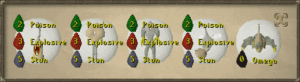
- Red eggs deal 3 damage to the target and deal 0-1 splash damage to other enemies within 3 tiles. Green eggs deal 1 damage and poison the target, dealing 5 additional damage over time. Blue eggs stun the target, preventing them from moving or being attacked for 6 seconds.
- Penance runners are usually the best choice to shoot. They always have 5 hitpoints, so they can be killed with only 2 red eggs. If the defender is skilled enough to not need assistance, eggs should be fired at the Penance healers instead. Fighters and rangers should be the final monsters killed with eggs, and only if the other monsters are all dead.
- Avoid using blue eggs, as penance are un-attackable and take no damage from poison or the egg launcher until no longer stunned, severely slowing down waves. Stunning penance at 0 health is even worse, as you must wait for them to regenerate a hitpoint before they can be killed again.
Surviving longer

Players struggling to survive may benefit from the following tips:
- At low health, run onto the west egg launcher hill, where Penance Fighters can’t attack you. When standing behind the hopper, rangers can’t attack you either. However, this will not block the Penance Queen’s ranged attacks, which can reach you anywhere in the arena.
- Communicate with your healer by right-clicking the horn and selecting the Medic option. This will alert them that you need healing.
- Grouping near the fighters and rangers will spread damage out, reducing damage on a single player. Aside from the collector, this should only be done later in the wave, after the penance healers are dead.
Fighting the queen
- Stand by the healing pool so that the healer does not have to run as much. Also, avoid standing on top of each other, so the healer does not have to right click to select a healing target.
- Remember the order for passing eggs: Collector -> Healer -> Attacker -> Defender -> Collector (commonly abbreviated as C.H.A.D.(C.)).
- It is recommended to have 2 healers for the fight with the queen in order to out-heal her damage. All players should wear armour with high ranged defence to minimise damage taken.
Spamming omega eggs
The most basic method of killing the queen involves all players working together to create 8 or so omega eggs. After the eggs are created, the collector loads the eggs in the egg hopper and everybody fires the egg launcher. However, spam-clicking to fire the omega egg greatly reduces the amount of omega eggs needed, killing the queen in as few as 1 egg. The team leader is incapable of doing this strategy, and should not fire any omega eggs.
Before trying this method, the collector should make sure that some normal eggs are loaded into the hopper, so that the cannon interface is visible before the omega egg is loaded. Once 1-3 eggs are made, the defender should give one egg to the collector and hold on to any others. Loading multiple omega eggs at once is never a good idea. There is no delay when firing omega eggs, so even a hopper full of 5 eggs will likely be depleted after a single tick of spam clicking. Selecting an omega egg and using it on the hopper allows the collector to load one at a time, which is highly recommended.
The steps required to spam omega eggs are as follows:
| Step | Action |
|---|---|
| 1 | Everybody except the team leader (who created the team) runs to the cannon and opens the interface. |
| 2 | The collector uses an egg on the egg hopper. Use the egg to load one at a time, do not left click the hopper to load all of them at once. |
| 3 | Everybody except the team leader and the collector now begin spam clicking the omega egg. |
| 4 | The spam clicking will cause the game to register multiple hits to the queen. |
| 5 | While 1 egg is enough with good spam, more eggs may be needed. Repeat steps 1-4 with more eggs as necessary. |
Wave information
The first number shows the number of monsters that initially spawn, and the second shows the monsters held in reserve; for example, on Wave 2, two runners spawn initially, and once the first runner is killed, another (the third) will spawn.
Creatures can be killed in any order; the first ones to spawn do not need to be killed first to allow others to spawn.
| Wave | Fighters | Fighter HP | Rangers | Ranger HP | Healers | Healer HP | Runners | Runner HP |
|---|---|---|---|---|---|---|---|---|
| 1 | 2+2 | 28 | 2+2 | 20 | 2+0 | 27 | 2+0 | 5 |
| 2 | 2+3 | 29 | 3+1 | 28 | 3+0 | 32 | 2+1 | 5 |
| 3 | 5+0 | 32 | 3+3 | 29 | 2+1 | 37 | 2+2 | 5 |
| 4 | 5+1 | 37 | 3+3 | 34 | 3+1 | 43 | 3+1 | 5 |
| 5 | 3+3 | 38 | 5+1 | 41 | 4+1 | 49 | 4+1 | 5 |
| 6 | 5+1 | 49 | 5+2 | 50 | 4+2 | 55 | 4+2 | 5 |
| 7 | 5+2 | 50 | 6+1 | 50 | 4+3 | 60 | 5+1 | 5 |
| 8 | 7+0 | 55 | 5+3 | 54 | 5+2 | 67 | 5+2 | 5 |
| 9 | 6+2 | 56 | 7+1 | 58 | 6+2 | 76 | 5+4 | 5 |
| 10 | 5+2 | 50 | 6+1 | 50 | 4+3 | 60 | 5+1 | 5 |
Team leader
The team leader, also known as the scroller, is the player who creates the team using the scroll.
The team leader can quick-start each wave by right-clicking the ladder. Furthermore, many aspects of the minigame process through the team leader player. This allows for several advanced strategies to speed up the wave, as elaborated upon below.
Stalling omega eggs
Omega egg spamming can be improved if the team leader uses an animation stall; an action with an animation that prevents the player from doing anything else. Because cannon shots process through the team leader, the leader can spam short animation stalls during loading of the omega egg so it will not be depleted from the cannon until the animation ends. This gives the team more time to spam click the eggs, drastically improving the chances of killing the queen with one omega egg. The longer the animation, the more time the team has to shoot. Note that only animations that can be used in combat will work for this purpose.
Here is a list of common stalls that are used:
| Stall | Extra ticks | Extra fire time | Notes |
|---|---|---|---|
| Equipping a mind shield or elemental shield | 1 | 0.6 seconds | Can be spammed if you bring two shields. |
| Studying Nuff’s certificate | 2 | 1.2 seconds | Must be studied, not read. |
| Drinking a shrink-me-quick potion | 3 | 1.8 seconds | Will not be consumed on use. |
| Preaching with the book of egg | 6 | 3.6 seconds | Safe but usually longer than necessary. |
Attacker
Attacker overview
The attacker’s job is to use combat to fight Penance Fighters and Penance Rangers. Every 30 seconds the attacker must change their attack style to match the new call from the collector. The attacker must also use their horn to call out the new egg colour for the collector. Attacking with the wrong style will deal 2 damage to the player, and deal no damage to the enemy monster. In addition, all players receive a penalty in the number of points received at the end of the wave, losing up to 20 points per wave for the attacker, and 10 points per wave for the other team members.
| Attack style | Arrow type | Spell type |
|---|---|---|
| Controlled | ||
| Accurate | ||
| Aggressive | ||
| Defensive |
Note: for players using Ranged, the arrow colours correspond to the spell type, which is often easier to check than to read the arrows’ names.
Gear for attackers
In Barbarian Assault, Ranged is significantly more effective than attacking with melee, even if the player’s Ranged level is lower than their Attack and Strength level; this is because of the high ranged strength bonus of the provided arrows. Magic is not recommended, as only standard spellbook spells are allowed to be used. The slow attack speed and damage of these spells paired with low defensive stats from magic equipment make it the worst of the three styles. The following table shows recommended setups:
| Slot | Recommended equipment for Ranged (high level) – Item (most effective → least effective) | ||||
|---|---|---|---|---|---|
| N/A | |||||
| N/A | N/A | ||||
| N/A | N/A | ||||
| N/A | |||||
| N/A | |||||
| N/A | |||||
- Only when using full Void Knight equipment.
- It is recommended to wear a blessing or arrows in the main slot so that the barbarian assault arrows don’t go into both slots.
- Can only be used when the called style is Accurate.
Make sure to set the bow to the Rapid attack style. Bringing divine bastion potions, or divine ranging potions and divine super defence potions, or Ranging potions and super defence potions is highly recommended. The attacker horn is automatically added to the player’s inventory during a wave, and the 4 types of arrows are obtained by using the attacker item machine.
|
|
| Slot | Recommended equipment for Ranged (mid level) – Item (most effective → least effective) | ||||
|---|---|---|---|---|---|
| N/A | |||||
| N/A | |||||
| N/A | N/A | ||||
| N/A | N/A | N/A | |||
- Only when using full Void Knight equipment.
Make sure to set the bow to the Rapid attack style. Bringing divine bastion potions, or divine ranging potions and divine super defence potions, or Ranging potions and super defence potions is highly recommended. The attacker horn is automatically added to the player’s inventory during a wave, and the 4 types of arrows are obtained by using the attacker item machine.
|
|
| Slot | Recommended equipment for Melee (high level) – Item (most effective → least effective) | ||||
|---|---|---|---|---|---|
| N/A | |||||
(Acc/Agg/Def/Ctrl) |
(Acc/Agg/Def/Ctrl) |
(Acc/Agg/Def) (Ctrl) |
(Acc/Def/Ctrl) (Agg) |
(Acc/Agg/Def/Ctrl) |
|
| N/A | N/A | ||||
| N/A | |||||
- Only with the full set. Better than Torva and the Blade of Saeldor with attacker role level 5.
- Both hitsplats gain additional damage based on your attacker level, up to 5.
Bringing divine super combat potions, or super combat potions, or super attack potions, super strength potions and super defence potions is highly recommended.
|
|
| Slot | Recommended equipment for Melee (mid level) – Item (most effective → least effective) | ||||
|---|---|---|---|---|---|
(Acc/Agg/Def) (Ctrl) |
(Acc/Agg/Def/Ctrl) |
(Acc/Agg/Def) (Ctrl) |
(Acc/Agg/Def/Ctrl) |
(Acc/Agg/Def/Ctrl) |
|
| N/A | |||||
| N/A | N/A | N/A | N/A | ||
- Only when using full Void Knight equipment.
- Both hitsplats gain additional damage based on your attacker level, up to 5.
Bringing divine super combat potions, or super combat potions, or super attack potions, super strength potions and super defence potions is highly recommended.
|
|
Waves 1-9 as attacker
The following is a list of steps for the first nine waves. Attackers should always run along the western way to reach the north-west corner of the arena when first leaving the starting area. This is where the fighters and rangers will spawn, and engaging them here will avoid luring monsters that are being fought by other teammates. If there are two attackers, one should focus on rangers and one on fighters to prevent wasting hits on the same enemy.
| Step | Action |
|---|---|
| 1 | Use the attacker horn to call the egg colour listed in the top-right corner of the screen. |
| 2 | If using Ranged or Magic, collect arrows or runes from the attacker item machine. |
| 3 | Drink potions if necessary. |
| 4 | Run along the western cannon to the northwest corner of the map, where the enemy creatures spawn. |
| 5 | Check the attack style listed in the top-right of the screen. |
| 6 | Attack the Penance Fighters and Penance Rangers. |
| 7 | Stop attacking when the call changes, every 30 seconds. |
| 8 | When the new attack style is called, continue killing the Penance creatures. |
| 9 | Once all the Penance Fighters and Rangers are dead, run to the east egg launcher. |
| 10 | If the collector has loaded eggs into the launcher, shoot red eggs at the Penance Runners (inexperienced teams) or Penance Healers (experienced teams), dealing 3 damage.If there are no more red eggs, use green eggs instead to deal 1 damage. |
| 11 | If/when all runners/healers are dead, shoot the other penance that are still alive. |
| 12 | Get ready for the next round. |
- If there is no attack style listed in the assault interface, ask the collector to use their horn to call out the attack style. Never attack a creature unless the correct attack style is selected, or else you and your teammates will suffer significant point penalties.
- As a solo attacker, if your combat stats are low (under 80), consider killing all the Penance Rangers first. Rangers have higher max hits and can even attack you on the cannon hills. If your combat stats are high, alternate between killing the Penance Fighters and Rangers to kill them more quickly.
- With a venator bow, it’s best to stand next to the ranger spawn and attack fighters to drag them over for bouncing arrows.
Wave 10 as attacker
The initial strategy for this wave is the same as before, except you should stay even more west, and there is no point penalty for using the wrong style (although you still receive 2 damage per wrong attack, and no damage will be done if the wrong style is used). As there is no east egg launcher, eggs can only be launched from the west hill.
When all Penance are killed, however, attackers must now use spikes from the petrified mushrooms around the battlefield on the omega egg. The collection of spikes can be done early, before the queen spawns.
| Step | Action |
|---|---|
| 1 | Call, stock up on ammunitions, drink potions, and fight the Penance as normal. |
| 2 | Use any red or green eggs in the launcher to help teammates, if needed. |
| 3 | While waiting for the queen to spawn, collect spikes from the petrified mushrooms. |
| 4 | Once the queen spawns, return to near the healing pool and kill the spawns as they appear. |
| 5 | As soon as you receive the poisoned eggs from the healer, use the spikes on them. |
| 6 | Give the spiked/pois. eggs to the defender by using them on the player. |
| 7 | Once the eggs are loaded into the egg launcher, launch them at the Penance Queen to kill her. |
Other role information
Attacker points
Compared to the other 3 roles, the attacker can collect the most points per round. Without any bonuses or penalties, 370 points are earned across all 10 waves. At the same time, however, the attacker can easily rack up penalties; every attack using the wrong style will incur a 1 point penalty for the collectors, healers and defenders, and a 2 point penalty for the attackers, resulting in up to 10 (20 for the attacker) points lost per wave.
Attackers are allowed to make one free mistake per wave without penalty. This should not be taken as a sign to be careless, as a few seconds of inattention each wave with incorrect attacks can easily lead to a 10 or more point penalty every wave, significantly reducing the points earned.
Wave 10 provides a fixed reward of 80 points in the player’s role and 5 points in the other 3 roles, and there are no penalties for incorrect attacks.
Attacker levels
As a level 1 attacker, every hit using the correct style will deal 1 bonus damage, even if the attack fails the accuracy roll. This scales up to a 5 bonus damage at level 5. Therefore, using fast weapons such as shortbows or weapons with multiple hits such as the venator bow provide the greatest bonus damage.
| Level | Honour Points | |
|---|---|---|
| 1 | N/A | 1 bonus damage |
| 2 | 200 | 2 bonus damage |
| 3 | 300 | 3 bonus damage |
| 4 | 400 | 4 bonus damage |
| 5 | 500 | 5 bonus damage |
Collector


Collector overview
The collector’s job is to gather eggs dropped by killed Penance creatures. The collector loads these eggs into the egg hopper, which then allows any teammate to fire the egg launcher and damage Penance. Note that both cannons share the same ammo pool; loading one will load them both. The collector is given a collection bag at the start of each round to store eggs in, but the eggs can also be stored in the inventory if the bag is filled up.
There are three different coloured eggs: Red, Blue, and Green. At any given time, only one colour of egg can be picked up; this colour will be called by the attacker every 30 seconds. Collectors must also call to the attacker, to communicate which attack style should be used.
Eggs will explode and deal 5 damage if the player picks up the wrong-coloured egg, or picks up an egg with a full inventory. This also reduces the total number of eggs collected by 1, lowering points gained.
Waves 1-9 as collector
The following is a list of steps for the first nine waves.
| Step | Action |
|---|---|
| 1 | Use the collector horn to call the attack style listed in the top-right corner of the screen. |
| 2 | Run along the western cannon to the northwest corner of the map, where the enemy creatures spawn. |
| 3 | Check the egg colour listed in the top-right of the screen. |
| 4 | Wait for Penance Fighters or Penance Rangers to be killed. |
| 5 | Pick up the appropriate eggs as the dying Penance drop them. |
| 6 | Stop collecting when the call changes, every 30 seconds. |
| 7 | When the new egg colour is called, continue picking up eggs. |
| 8 | When you have a full inventory, run to the west egg launcher. |
| 9 | Load eggs into the egg hopper. |
| 10 | As needed, shoot red eggs at the Penance Runners (inexperienced teams) or Penance Healers (experienced teams), dealing 3 damage.If there are no more red eggs, use green eggs instead to deal 1 damage. |
| 11 | If/when all runners/healers are dead, shoot the other penance that are still alive. |
| 12 | Get ready for the next round. |
- In downtime, grab as many correct eggs as you can, as more eggs collected means more points for you. If your inventory is full of eggs, either load them into the cannon or destroy them by shift-clicking, and carry on picking up more. Destroying eggs instead of loading will not penalise you.
Wave 10 as collector
Wave 10 starts the same as with previous waves, except you should stay even more west, and this time there is no east egg launcher and eggs can only be launched from the west hill.
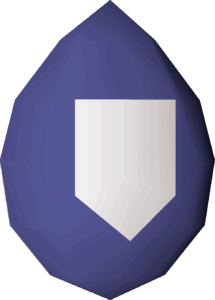
When the queen arrives, the collector must pick up yellow eggs that appear by the Queen. Yellow eggs can be picked up regardless of the current colour of egg called. The eggs must be used on the healer to hand them over. The defender will pass the completed omega eggs back to the collector, at which point the collector must load them into the hopper to be fired at the queen.
Note: Since collectors must run near the Penance Queen to obtain the yellow eggs, the healer may have to leave the spring to heal them.
| Step | Action |
|---|---|
| 1 | Call, collect eggs, and launch eggs at the Penance as normal. |
| 2 | Make sure there’s at least one red, green, or blue egg loaded that isn’t fired at Penance. |
| 3 | Wait for the queen to spawn. |
| 4 | Collect yellow eggs from near the queen as soon as they appear. |
| 5 | Run to the healer and hand them (use on them) the yellow eggs. |
| 6 | As soon as you receive the omega eggs from the defender, run to the cannon. |
| 7 | Load the omega eggs into the hopper one at a time by using the eggs manually. |
| 8 | Repeat the process if the penance queen did not die already. |
Proper loading for spam-clicking
If the team is attempting the omega egg spam-clicking method (explained under #Fighting the queen), the collector should stand a couple tiles south of the egg hopper waiting to load. When all your teammates except the team leader are at the cannon ready to spam-click fire, click the omega eggs in your inventory and use them individually on the hopper. This will add one single egg at a time, maximising the number of hits per omega egg.
Make sure there’s at least one egg of any colour loaded into the hopper before loading the omega egg. This can be done before the queen spawns. Doing so is necessary to keep the cannon interface active for your teammates so they can spam-click fire the omega eggs.
Other role information
Collector points
The collector gets the lowest amount of base points per round of 10 waves: 278 points. However, every 4.35 eggs collected provides all collectors with 2 honour points, and other team mates with 1 honour point. Therefore, collect every correct egg you can until the wave ends, while still making sure to call and load the hopper as needed. Note: Collecting eggs while your inventory is full will decrease the amount of points earned.
If you have a full inventory but cannot deposit into the egg launcher due to it being full, shift-click the eggs in your inventory to destroy them. Eggs are destroyed from first to last position in your inventory, so it is recommended to repeatedly shift-click the last egg of the colour you wish to destroy. Eggs in the collection bag are not destroyed. During gameplay, it is important that the egg launcher is used to kill runners whenever possible, in order to prevent high penalties from runners that get away; this should be prioritised over points.
Points received for collector are the number of eggs picked up, minus eggs exploded. As such, any penalties incurred can be offset by collecting more eggs. Wave 10 provides a fixed reward of 80 points in the player’s role and 5 points in the other 3 roles, and there are no bonuses or penalties for egg collection.
Collector levels
Leveling up the collector role allows the player to hold more eggs in their bag, as well as allowing the player to convert their eggs into different colours. At a high collector level, this can be used to convert blue and green eggs into into red eggs, getting red eggs into the cannon faster than a normal level 1 collector who has to wait for the cycle to give them red eggs organically. Converting eggs to shoot runners before they escape is a great strategy to save your team from losing points.
| Level | Honour Points | |
|---|---|---|
| 1 | N/A | Bag holds 2 eggsNo conversion |
| 2 | 200 | Bag holds 4 eggsConversion chance ~20% |
| 3 | 300 | Bag holds 6 eggsConversion chance ~40% |
| 4 | 400 | Bag holds 7 eggsConversion chance ~60% |
| 5 | 500 | Bag holds 8 eggsConversion chance ~80% |
Defender

Defender overview

The defender’s job is to prevent Penance runners from escaping through the tunnel on the south wall of the arena. This is done by dropping bait on the ground that attracts runners, leading to traps that kill them. Each runner that successfully escapes will penalise the team by 3 points, for a capped maximum loss of 10 points per wave (doubled to 20 for the defender). Escaped runners will also respawn at the northern caves, meaning the team must deal with them to finish the wave rather than simply let them pass.
The bait the defender must use will be displayed in the top right corner of the defender’s screen when the healer uses their horn to call Every 30 seconds. The defender must also call which poisoned food the healer must use.
Trapping runners
To use bait, the defender must left click (not shift click, or it will be destroyed) the bait in their inventory to drop it on the ground. Bait dropped while it is what’s currently called is known as “good food”, while the other two baits are “bad food”. When dropped, good food will always stay good and bad food will always stay bad, even after the call changes.
| Name | Description | Example |
|---|---|---|
| Good food | Bait dropped while it was the correct call. | Worms |
| Bad food | Bait dropped while it was not the correct call. | Tofu |
Every time a penance runner stops, it looks for food within range (4 tiles for level 1, 5 tiles for level 2-5). If it does not find food, it will randomly walk in any direction except north, with a strong preference to the south. If it does find food, it broadens its search range to find the best food surrounding it up to 15 tiles away. Runners prefer food that is to the east of them the most, which is why only the east trap is recommended to be used. Whether or not the food is good or bad does not matter to the runner. It will simply eat the most recently dropped food in the area it likes best.
When a runner eats good food, it will say “chomp, chomp.” then look for a new food shortly after. When a runner eats bad food, it will say “blughhhh.” then run straight north for several seconds, walk again, and only then look for a new food. Only good food can be used to kill runners at the traps. Bad food may be used to lure runners north that have walked south past the defender’s trap.
When a runner eats good food on or surrounding a trap, the runner will be killed and one of the trap’s charges will be depleted. Unused or repaired traps have two charges, meaning the traps can kill two runners before reaching zero and breaking. When the trap breaks it must be repaired to kill any more runners.
Traps can be repaired with the hammer and logs found in the arena. The logs re-spawn every 6 seconds, and can be found at the center-north end of the arena. A trap can also be repaired with either zero charges or with one charge remaining, but the latter action should only be done if the defender has extra logs or needs the trap to have 2 charges for a multi-kill.
The defender will need a differing number of logs on each wave for enough trap charges to kill the runners:
| Wave | Runners | Logs needed |
|---|---|---|
| 1 | 2 | 0 |
| 2 | 3 | 1 |
| 3 | 4 | 1 |
| 4 | 4 | 1 |
| 5 | 5 | 2 |
| 6 | 6 | 2 |
| 7 | 6 | 2 |
| 8 | 7 | 3 |
| 9 | 9 | 4 |
| 10 | 6 | 2 |
Multi-killing
Multi-killing is a strategy for killing multiple runners on a single trap charge. This means less time is spent repairing, fewer logs may be needed for the wave, and the chance of runners eating each other’s bait (causing them to run away) is significantly lower.
The easiest way to multi-kill requires the defender drop bait by the trap and stand on top of it. When a player is standing on top of it, runners can not pass through the player to eat the bait, and thus get stuck. The runner trap must be fully repaired with 2 charges for this method to work.
Once the runners have gathered around the bait, the defender should step one tile to the south and stand there. This will first let one runner eat at the trap and die, followed by the rest of the stack shortly after. Some runners in the stack may move away from the trap during the multi-kill and thus not die, but they can be dealt with by stepping back on the bait and setting up for another multi-kill (the runners will target the remaining bait in the pile).
Other players running through the defender will also cause the runners to pass through the defender. To continue blocking runners, the defender should step off of the bait and then step back on, so the runners can no longer pass through.
Waves 1-9 as defender
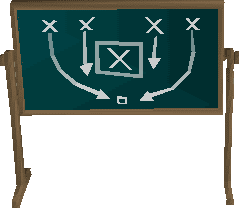
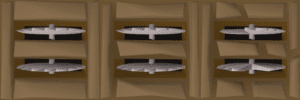
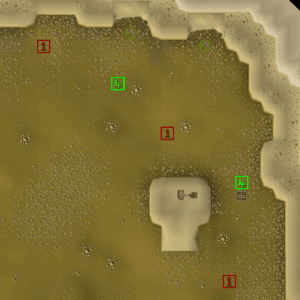
The following is a list of steps for the first nine waves. Dropping bait quickly on the tiles shown in the accompanying image is critical, or else the runners will wander away from the bait. It is safe to drop bad bait on the spots shown in the following picture; the runners will never eat that bait unless the good bait runs out. Note that all bait dropped in the following setup is intended to lure runners to the east trap, not the west one.
| Step | Action |
|---|---|
| 1 | Use the defender horn to call the poisoned food type listed in the top-right corner of the screen. |
| 2 | Use the defender item machine to fill your inventory with bait. |
| 3 | Drop one bad bait a few tiles south of the eastern trap. |
| 4 | Drop four good bait on the tile north of the trap. |
| 5 | Drop one bad bait between the three large spikes. |
| 6 | Drop four good bait on the tile west of the northern large spike. |
| 7 | Drop one bad bait by the logs. |
| 8 | Grab as many logs are needed for the wave. (Wait for them to respawn). |
| 9 | Grab a hammer unless you have the Imcando hammer equipped. |
| 10 | Run back to the trap. Call the poisoned food to the healer again when the call changes. |
| 11 | Wait for the trap to break. When it does, stand on top of the bait north of the trap to block more runners from eating. |
| 12 | Drop all the newly called good bait on the tile north of the trap. |
| 13 | Repair the trap to full. Wait for the rest of the spawning runners to gather around the bait. |
| 14 | When the runners have gathered, step 1 tile south onto the trap. Wait for the stack of runners to die. |
| 15 | Repeat fixing the trap, gathering, and killing runners in stacks until they are all dead. |
| 16 | If any Penance are alive, shoot them with red or green eggs from the egg launcher. |
- Note that runners that move away from the trap during a multi-kill may not die. Simply stand on top of the bait and wait to stack the runners again if this happens.
- If a runner has passed your line of bait and is headed to the exit, drop a line of “bad” bait from the exit to the eastern trap. This will lure the runner back, and any “bad” bait can be eaten to redirect the runner north without penalty.
- If the collector has loaded red or green eggs into the egg launcher, shooting escaping runners is highly effective and has no point penalty.
- The hammer and logs can also be used to build barricades in front of the northern caves. These barricades will block all Penance from coming through until they’re destroyed. Building barricades is not recommended for practiced teams, since barricades dramatically slow down the wave. Low-combat and inexperienced teams may find them useful on later waves, especially for overwhelmed attackers.
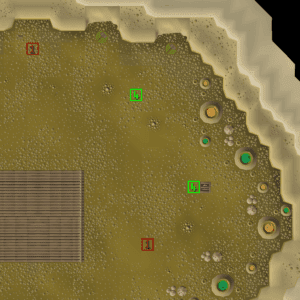
Wave 10 as defender
Because the arena is different and there are objects the runners often get stuck on, a different drop pattern is recommended for wave 10. Since there is no eastern cannon on this wave, defenders will not have any help from eggs, and must be able to kill the runners by themselves.
When given a spiked/pois. egg by an attacker, defenders must dunk it into a lava crater by clicking the crater, and then pass the now-finished omega egg back to the collector.
| Step | Action |
|---|---|
| 1 | Use the defender horn to call the poisoned food type listed in the top-right corner of the screen. |
| 2 | Use the defender item machine to fill your inventory with bait. |
| 3 | Drop one bad bait south of the large spike below the eastern trap |
| 4 | Drop four good bait on the tile west of the trap. |
| 5 | Drop four good bait east of the large spike between the runner and healer caves. |
| 6 | Drop one bad bait at the logs. |
| 7 | Grab two logs |
| 8 | Grab a hammer unless you have the imcando hammer. |
| 9 | Run back to the trap. Call the poisoned food to the healer again when the call changes. |
| 10 | Wait for the trap to break. When it does, stand on top of the bait west of the trap to block more runners from eating. |
| 11 | Drop all the newly called good bait on the tile west of the trap. |
| 12 | Repair the trap to full. Wait for the rest of the spawning runners to gather around the bait. |
| 13 | When the runners have gathered, step 1 tile south. Wait for the stack of runners to die. |
| 14 | Repeat fixing the trap, gathering, and killing runners in stacks until they are all dead. |
| 15 | Run to the egg launcher and fire red and green eggs at any remaining penance. |
| 16 | When the queen spawns, wait near the healing pool. |
| 17 | When the attacker passes spiked/pois. eggs to you, dunk them in a lava crater. |
| 18 | Pass the completed omega eggs back to the collector by using them on the player. |
| 19 | Once the eggs are loaded into the egg launcher, launch them at the Penance Queen to kill her. |
- If a runner is stuck on a mushroom, lava crater, or poison pool, dropping bait near it will get it unstuck.
Other role information
Defender points
The defender collects a lot of base points per round. Without any bonuses or penalties, 357 points are earned across all 10 waves. At the same time, however, the defender can quickly lose points due to escaped runners – each escaped runner incurs a 6-point penalty for the defenders, and a 3-point penalty for the other 3 roles. Therefore, it is very important to follow a proper strategy to avoid massive penalties.
Unlike the other roles, using the incorrect food does not incur a point penalty.
Wave 10 provides a fixed reward of 80 points in the player’s role and 5 points in the other 3 roles, and there are no penalties for escaped runners.
Defender level
Increasing the defender level to 2 will increase the Penance runner’s sight range to react when there is food within a 5-range radius instead of a 4-range radius. Further defender levels have no effect, but level 5 is still required for the Elite Kandarin Diary.
| Level | Honour Points | |
|---|---|---|
| 1 | N/A | 4 tile lure range |
| 2 | 200 | 5 tile lure range |
| 3 | 300 | 5 tile lure range |
| 4 | 400 | 5 tile lure range |
| 5 | 500 | 5 tile lure range |
- Note that the in-game displayed reward for the Defender role is false. Upgrading beyond level 2 does not actually improve lure range.
Healer

Note: in Barbarian assault, the term “healer” refers both to a player who holds the healer role and the Penance Healer monster. In this guide, “healer” or “healer role” will describe the role, and “Penance Healer” will describe the monster.
Healer overview

The healer’s job is to use poisoned food (worms, meat or tofu) to kill the Penance Healers, as well as keep their teammates alive with the healing vial, a hitpoints-restoring item filled from the pool to the south. The type of poisoned food that has to be used on the Penance Healers is called by the defender. Wrong food will not poison the Penance Healer, and will instead display a red message in the game chat saying That’s the wrong type of poisoned food to use! Penalty!.
As with all other roles, the healer must also call, in this case to the defender.
Healing teammates


Near the bottom of their screen, the healer has an interface showing the hitpoints of their teammates. At all times, but especially after wave 7, the healer should pay close attention to see if any teammates are low health. A red flashing star means the teammate requested your assistance.
To heal teammates, the healer must first fill the vial received from the healer machine on the healer spring by either using the vial on the spring, or right-click the spring itself. Once filled, healers can use it on teammates to restore their hitpoints, cure poison, and restore some run energy. The amount of health and run energy restored depends on the role level of the healer.[1]
Note that only healers can drink directly from the spring by left clicking on it to heal themselves.
| Level | Hitpointsrestored | Run energyrestored |
|---|---|---|
| 1 | 1+10% | 20% |
| 2 | 2+20% | 25% |
| 3 | 3+30% | 30% |
| 4 | 4+40% | 35% |
| 5 | 5+50% | 40% |
| Level | Hitpointsrestored | Run energyrestored |
|---|---|---|
| 1 | 10 | ? |
| 2 | 15 | 25% |
| 3 | 20 | ? |
| 4 | 25 | ? |
| 5 | 35 | ? |
When teammates are very low health, they are usually either found hiding on the hill of the west egg launcher or running towards the healer spring. Healers should check these places first, and make sure as always to keep calling with the horn, even when healing teammates.
Efficient use of food
To poison a penance healer, simply use the food called by the defender (worms, meat or tofu) on it. This will deal 4 damage directly as well as inflict poison, which will damage the penance healer over time. The damage from poison will decrease every 5 natural poison hits, but using another poisoned food on the penance healer will reset the damage back to 4.
The basic strategy is to always make sure all penance healers are poisoned at least once. Stand next to the penance healer spawn (north-east cave) and use one poisoned food on each penance healer as they spawn every 6 seconds. Once healers stop spawning, start using poisoned food on whichever penance healers are taking less than 4 poison damage. If all penance healers are taking 4 damage, spam use food on a single penance healer to spawn reserve penance healers as soon as possible.
After the second call you will have to restock at the healer item machine. Shift-click to destroy all of the remaining food in your inventory, then click the machine to fully restock your inventory. Do not run through the defender if they stand near their trap, as doing so will mess up their multi-kill and severely slow down the wave. This is most prone to happen when poisoning penance healers near the trap, or when running south to re-stock, so be extra careful during these moments.
Waves 1-9 as healer
The following is a list of steps for the waves 1-9. Healers should always run east around the east egg launcher towards the north-east corner of the arena. This is where the healers will spawn.
| Step | Action |
|---|---|
| 1 | Use the healer item machine to fill your inventory with food. |
| 2 | Right-click the healer horn to call the food type listed in the top-right corner of the screen (next to the mouth). |
| 3 | (Optional) Use the healing vial on the healer spring to fill it. (Can be skipped on earlier waves or with high level teams) |
| 4 | Use one poisoned food each on every penance healer that spawns |
| 5 | Every 30 seconds, use the horn again to call. |
| 6 | When necessary, heal your teammates with the healing vial. Re-fill it on the healer spring if it is empty. |
| 7 | Once all remaining Penance Healers are poisoned at least once, use remaining food on Penance Healers that have less than 4 damage being dealt to them. |
| 8 | Restock at the healer item machine when you run out or only have one type of food left. |
| 9 | Repeat steps 5-7 until all Penance Healers are dead. |
| 10 | Keep making sure everybody has enough health. |
| 11 | Use the egg launcher to kill any remaining runners, fighters, or rangers. Do not shoot blue eggs. |
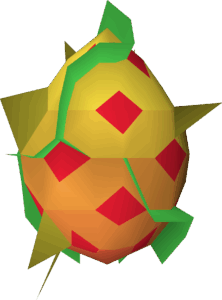
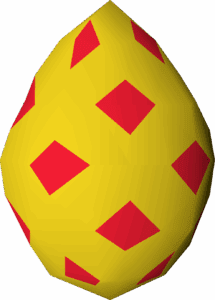
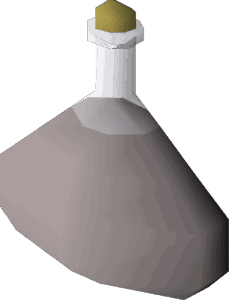
The poisoned egg, made by the healer after dipping the yellow egg in poison.
Wave 10 as healer
The start of the last wave is similar to the previous waves, except that no penalty is received when using the wrong food (even though the chat states otherwise), and the penance healers now spawn from a cave slightly more west.
When the queen spawns, the first priority of the healers is now to keep everyone alive. Healers should focus on always keeping everybody above 50 hitpoints if possible, such that everybody can safely sustain the many hits from both the queen and her spawns while manufacturing the omega eggs. Players struggling to heal their teammates should consider using two healers for this round. Before everyone runs to the cannon, make sure all teammates have high hitpoints and that the vial is filled, and proceed to help spamming the omega egg.
When making the omega egg, the healer will receive yellow eggs from the collector, which have to be dipped in the poison crater and then passed to the attacker.
| Step | Action |
|---|---|
| 1 | Call, stock up on food, and kill the penance healers as normal. |
| 2 | Before the penance queen spawns, heal everyone on the team to full hitpoints. |
| 3 | When the queen spawns, stay near the healing spring and continuously heal teammates. |
| 4 | After you get the yellow egg from the collector, use it on a poison crater. |
| 5 | Use the poisoned yellow egg on the attacker. |
| 6 | Return to healing your team |
| 7 | When everyone is healthy and your vial is full, run to the cannon to fire the omega egg(s) |
| 8 | Once the eggs are loaded into the egg launcher, launch them at the Penance Queen. |
| 9 | Repeat steps 4-8 if she did not die. |
Other role information
Healer points
The healer gets the second lowest amount of base points per round of 10 waves. However, every 18 hitpoints healed provides an extra honour point, with a cap of 28 per wave. Using wrong poison packs will decrease honour points gained by 1 for every 4 wrong poisons.
Even if your team is not in danger of dying, it is beneficial to try healing them up to full health before the end of each wave for the extra points. Some teams may find it worthwhile to choose not to wear defensive armour to increase the amount of health the healer can replenish. Additionally, Divine potions may be brought to lower health by 10 per dose, which may then be healed for points. Araxyte venom sacks may also be used, but will only be allowed to be eaten near the spawn tiles.
